

HAM DinSwitch
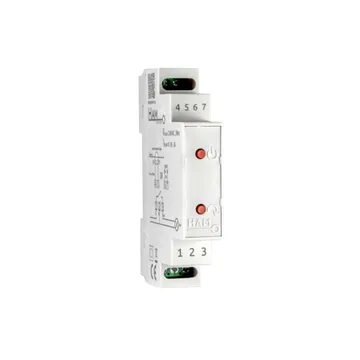
The HAM DinSwitch turns a load on and off from the app and measures energy. You install it on a DIN rail in the electrical panel.
The serial number starts with 12:. It is a device of the older generation. The newer device in this category is the HAM DinSwitchM.
What it measures
Section titled “What it measures”| Reading | Unit | Note |
|---|---|---|
| Energy | kWh | Total consumption. |
| Energy 2 | kWh | Second counter, for an alternate tariff, for example a night tariff. |
| Power appr. | W | Approximate power. |
| Gen. In. | open / closed | General input. Give it a name in the settings. |
| Cost (approx) | From the Cost per kWh setting. | |
| Cost (Since bill) | Cost since the last bill. | |
| Bill prediction | Prediction of the next bill. It also uses Fixed costs. | |
| CO₂ Emissions | ton | Calculated from energy. |
| Energy (Daily), (Weekly), (Monthly) | kWh | Energy per period. |
Typical uses
Section titled “Typical uses”- Water heater, pumps and other loads that you control with a schedule.
- Consumption metering for one circuit of the panel.
- Energy cost monitoring and bill prediction.
Installation
Section titled “Installation”The device gets its power from the panel. Install it on a DIN rail.
For heavy loads, such as a water heater or a motor, use the device with a 2NO 25 A power relay. The power relay is a separate product.
Some versions ship without a current transformer (CT). Check your order.
Connect to WiFi
Section titled “Connect to WiFi”You connect the device from the mobile app. Select HAM DinSwitch in the list.
- Press and hold the on/off button for a few seconds.
- Release the button when the LED starts to blink.
- Continue with the steps in Connect to WiFi.
When the device is connected, the green LED stays on. See LED states.
Terminals and protection
Section titled “Terminals and protection”- Terminal 1: line in. Terminal 2: neutral. Terminal 3: line out to the load.
- Terminals 6 (S0+) and 7 (S0-): pulse input from a meter.
- The device has no overload or short-circuit protection. Install an overload protection device in the panel.
- Install it in a panel that normal users cannot open.
- Do not use the device to switch the power of the router.
Settings
Section titled “Settings”- Pulses per kWh: the function of the input. Select Energy meter, General input or Toggle output. For an energy meter, enter the pulses per kWh of the meter.
- Cost per kWh: the energy price for this device. It overrides the account setting.
- Cost per kWh (alternate metering): the price for the second energy counter.
- Fixed costs: the fixed costs of the device. The platform uses them to predict your next bill.
- Disable manual control: the device buttons do not change the output.
- Do not keep track of data: the platform keeps no reading history for the device.
- Allow LAN commands: other devices on your local network can control this device. Keep the setting off if you do not need it.
General settings for all devices are in Device settings.
Controls
Section titled “Controls”The device has one output, Out. You turn it on and off from the device page or with the on/off button. See Controls.
On the device page, tap Edit and then Settings on the output. There you set:
- Auto turn-off: the output turns off after the time that you set. This also applies when you turn it on with the button. The value 0 disables it.
- Power on value: the output state when the power comes back, off or on.
- Confirm output changes: the app asks for confirmation before it changes the output.
- PIN Code: the app asks for a PIN before it changes the output.
In the Notifications and Automation section of the page you find:
- Schedule: up to 6 schedules for the output. See Schedules.
- Local rules: 2 rules that run on the device without a cloud connection.
- Accumulator limits: the output turns off when energy reaches a limit.
Recommended rules
Section titled “Recommended rules”The Recommended setups button on the device page suggests:
- A notification when the device loses connection for 15 minutes. It also tells you about a power cut at the site.
- Automatic output turn-off after a delay.
- A schedule for on and off times.
See Your first alert and Offline alerts.
Troubleshooting
Section titled “Troubleshooting”- Energy is 0 with a load connected: the device may have no CT.
- Energy is wrong by a constant factor: check the value in the Pulses per kWh setting.
- The device does not connect to WiFi: make sure that the router transmits on 2.4 GHz with a 20 MHz channel. See WiFi setup fails.
See also Wrong values and Device offline.
Specifications
Section titled “Specifications”| Mounting | DIN rail |
| Power supply | 230 VAC, less than 2 W |
| Outputs | 1, up to 5 A at 230 VAC |
| Connectivity | WiFi 2.4 GHz, 20 MHz channel |
| S0 input | For a meter with pulses, approximate energy and power |
| Operating temperature | -10 to 55 °C |
| Dimensions | 1 DIN module, 17.5 mm |
| Material | ABS UL 94 V-0 |
To buy, see the shop.