

HAM HumiSense
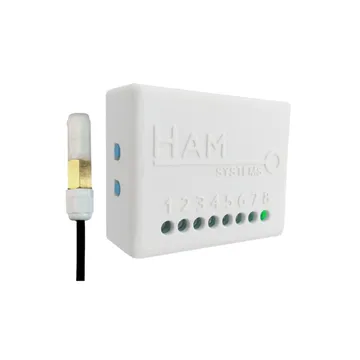
The HAM HumiSense logs temperature and relative humidity and alerts you when they go out of range. It is for warehouses, cold rooms, wine cellars and other areas where humidity is important.
The serial number starts with e13:. The older version has a serial number that starts with 25:.
What it measures
Section titled “What it measures”| Reading | Unit | Note |
|---|---|---|
| Temperature | °C | From the probe. |
| Humidity | % | Relative humidity. |
| Dew Point | °C | Calculated from temperature and humidity. Older version (25) only. |
| WBGT (Indoor) | °C | Heat stress index for indoor areas. Calculated. |
| General input 1, 2 | open / closed | For a magnetic door contact. Shows when you configure the input. |
| Input counter 1, 2 | count | Counts the changes of the input. Shows when it has counted something. |
Typical uses
Section titled “Typical uses”- Food and raw material warehouses.
- Cold rooms for fruit and vegetables.
- Wine cellars and wineries.
- Workplaces, for the heat stress of the workers.
- Temperature records for HACCP.
HACCP, cold chain and EN 12830
Section titled “HACCP, cold chain and EN 12830”HAM loggers are used for HACCP temperature records. Each reading has a date and time and stays in your account. You can export reports for the inspection. A calibration certificate is available per device, as a separate line on the order.
Installation
Section titled “Installation”- Put the white box outside the cold area. Attach it with double-sided tape.
- Put the probe through the door gasket or through a special opening. Ask your refrigeration technician about the opening.
- Put the probe at the point you want to monitor.
- Connect the 5 V micro-USB adapter that comes in the box.
- Connect the device to WiFi from the mobile app. Press and hold the setup button until the green LED blinks. See Connect to WiFi.
When the device is connected, the green LED stays on. See LED states.
Do not put the probe near the door, in front of the fan, near the lamp, or against walls and products. For more, see physical installation.
Terminals
Section titled “Terminals”- The probe connects to terminals 3 (3.3 V, red), 4 (SCL, yellow), 5 (SDA, green) and 6 (GND, black).
- The general inputs are terminals 7 and 8. Terminal 8 can become an alarm output.
Settings
Section titled “Settings”- Calibration table (in Advanced): field correction, up to 6 points. There is one table for temperature and one for humidity. Press Calibrate to fill it in.
- General input is alarm output: the last general input becomes an alarm output. A rule with the action Alarm output turns it on.
- Alarm buzzer mode (
e13only): the device makes a sound when an alarm is active. It is on by default.
The general settings of all devices are in device settings.
Recommended rules
Section titled “Recommended rules”The Recommended setups button on the device page suggests:
- An alert when the temperature goes out of range.
- An alert when the humidity goes out of range.
- An alert when the device stops sending data.
See Your first alert and offline alerts.
Troubleshooting
Section titled “Troubleshooting”- The temperature is a few degrees off: check the position of the probe. See wrong values.
- Gaps in the chart: see chart gaps.
- The device is offline: see device offline.
Specifications
Section titled “Specifications”| Sensor | Digital temperature and humidity sensor, calibrated by its manufacturer |
| Temperature accuracy | ±0.5 °C |
| Humidity accuracy | ±4% RH |
| Power | 5 V micro-USB adapter (included) or 5-12 V DC on terminals 1 and 2 (connection by a technician) |
| General inputs | 2, for magnetic contacts |
| Connectivity | WiFi 2.4 GHz |
| Measuring range | -20 to 85 °C, 0-100% RH |
| Resolution | 0.1 °C, 0.1% RH |
| Device operating temperature | -10 to 55 °C |
| Dimensions | 55 x 44.1 x 21.5 mm |
| Material | ABS V-0 |
To buy, see the shop.